
Raindance AI Trend: A Two-Photo Seaside Video Guide
The Raindance AI trend casts you and a partner in a seaside music-video moment: an entrance on the pier, close-ups, and a shared ending. Make the roughly 28-second version with two photos in the Raindance AI tool, with the performance and original reference soundtrack already prepared.
Open the Raindance tool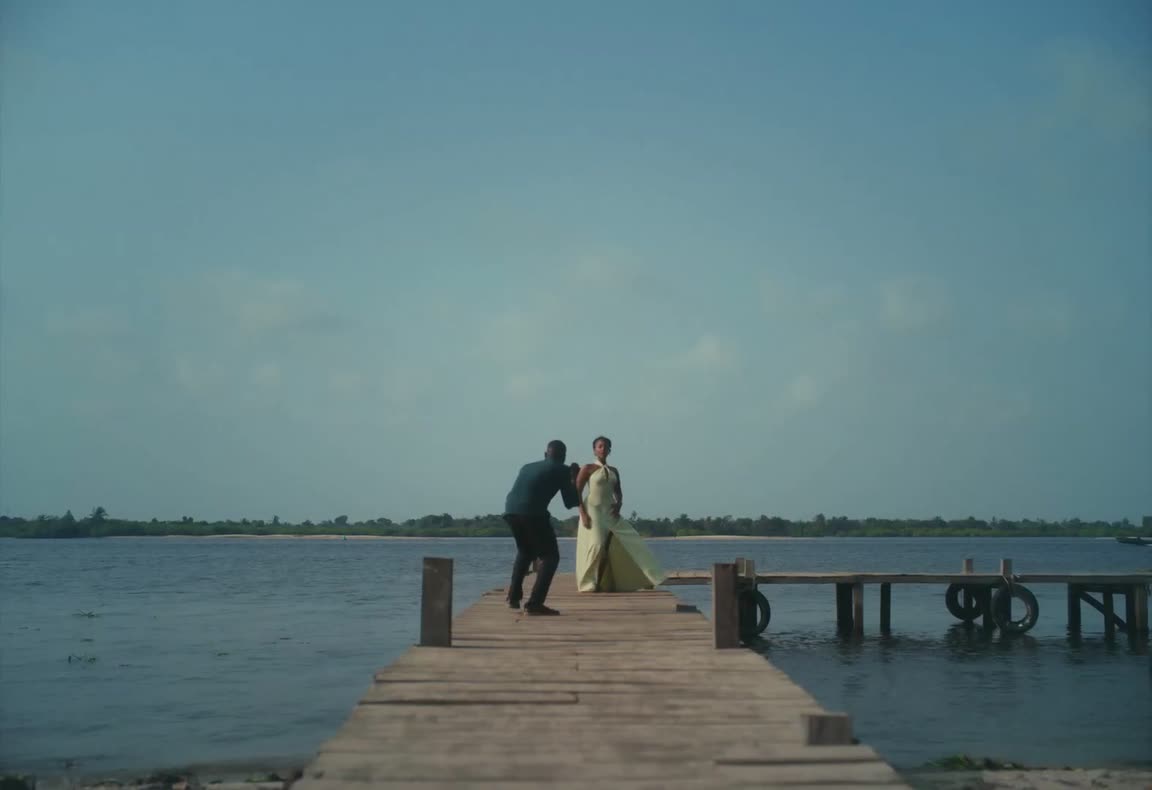
The song and seaside scene behind Raindance
Raindance is a song by Dave featuring Tems. Universal Music’s release announcement dates the official video to January 9, 2026 and identifies Lagos, Nigeria as its filming location. That is the music-video background behind the name used by this AI trend.
The seaside adaptation turns the two-person performance into a scene you can recast with your own photos. The version here begins on a wooden pier, follows one performer approaching and appearing in close-ups, and brings both together later. Its appeal is seeing a familiar pair inside a relaxed music-video setting, with the movement already arranged.
The song’s release and the first AI remix are separate parts of the story. A confirmed first creator of this particular seaside AI version has not been established.
Choose a pair that makes the scene yours
A couple’s seaside cameo
Use a clear photo of each partner for a music-video-style keepsake. You can take the photos separately; the prepared reference brings the two roles into one scene.
Two friends, unexpected casting
Give the expressive entrance and close-ups to one friend, and the seated pier role to the other. Choose the roles by personality, then match each photo to the upload order below.
Your original character duo
Try two characters whose outfits and silhouettes are easy to tell apart. A consistent illustration style helps the pair feel like they belong to the same story across the changing shots.
Assign the roles before choosing the photos
The reference begins with a man seated on a wooden pier. A woman approaches, appears in close-ups, and joins him in the later two-person shots. Your two photos replace their visible appearance while the reference supplies the actions, cuts, camera, seaside setting, and timing.
Photo 1: the dark-shirt role
This photo replaces the source performer in the dark green shirt, who starts seated on the pier. Track this role into the shared and rear-view shots.
Photo 2: the mint-dress role
This photo replaces the source performer in the mint-green dress, who approaches the pier and carries most close-ups. The replacement can be any gender; the source clothing identifies the role.
Avoid assigning the photos as “left person” and “right person.” Positions change across cuts. Keep the same photo attached to the same source performer throughout the sequence. Two separate photos are required, even when the people already appear together in one picture.
Prepare one consistent character reference for each role
Start with a sharp full-body photo of each consenting person, or a character you have permission to use. Include the complete outfit and shoes. A tight portrait can show the face well but leaves the body, wardrobe, and back view for the model to interpret.
For more explicit coverage, use one three-panel image per role: a full-body front view, a full-body back view, and a face-and-shoulders close-up. All three panels should show the same person, hairstyle, proportions, and outfit. Upload the whole sheet as one file; it does not need three separate slots.
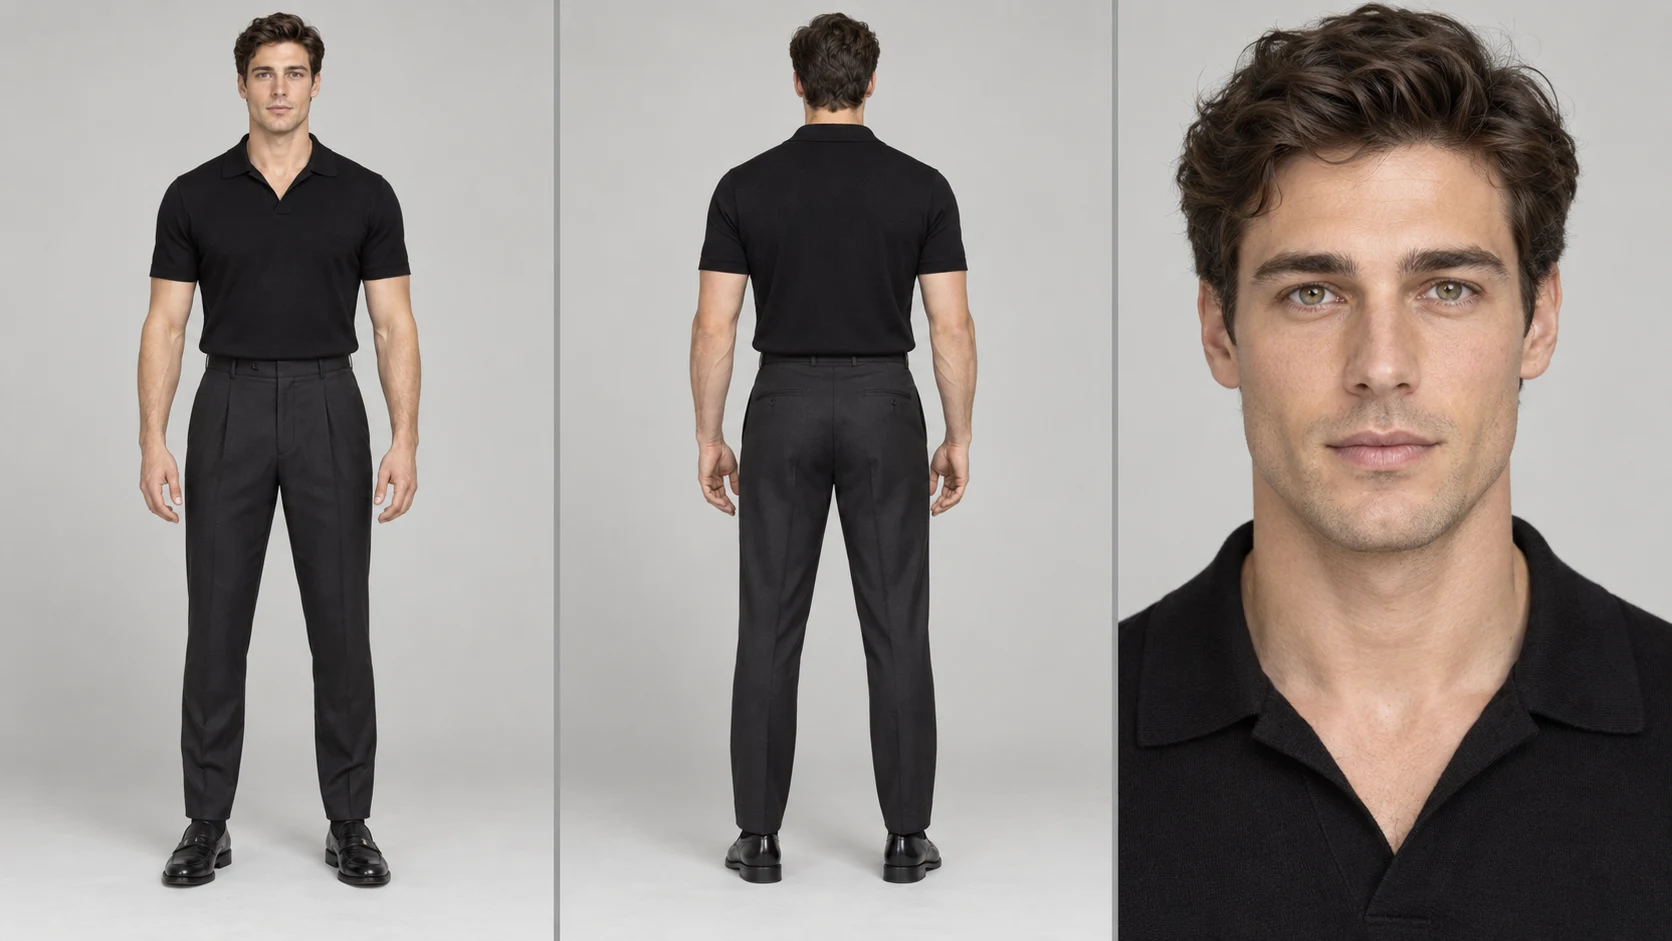
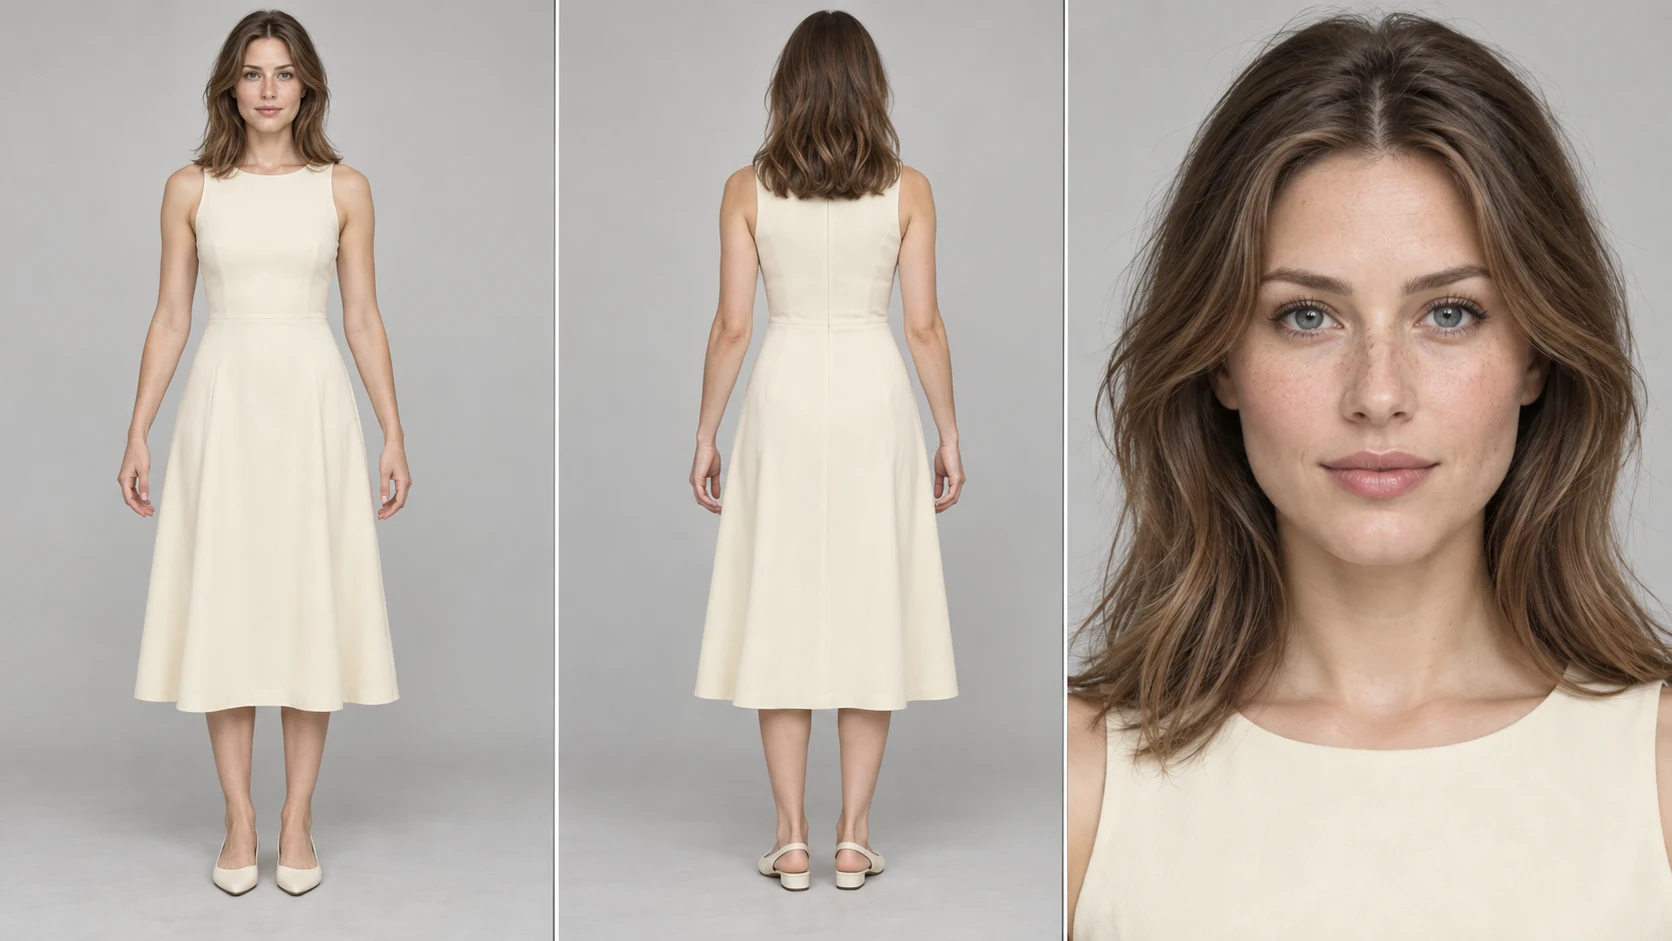
Use even lighting, a plain background, and visible hands. Simple garments with clear silhouettes are easier to inspect across turns than tiny prints or intricate accessories. The photos supply the replacement clothing; you do not have to dress someone in green to match the source role. Clothing can still change in the result.
Create the seaside video
1Open and watch the reference
Open the Raindance workspace. The fixed seaside clip and prepared prompt are already selected. Watch the entrance, close-ups, and ending so you know where each photo will appear. You do not need to upload another motion video.
2Upload both character files in order
Put the dark-shirt replacement in Photo 1 and the mint-dress replacement in Photo 2. Use JPG, PNG, or WebP files and check both previews. Replace an incorrect photo before submitting. The page waits for both photos and the reference to be ready.
3Choose resolution and review the estimate
The page uses Seedance 2.5 Edit and starts at 480p. Settings also offers 720p and 1080p. Length and framing follow the roughly 28-second reference. Read the current credit estimate beside Generate; increasing resolution does not guarantee more stable identities or better mouth movement.
4Generate and review the complete result
Sign in when prompted and select Generate when the setup is ready. Uploading files alone does not submit the job. Follow progress in My creations, then play the whole video with sound before downloading. Check an existing processing job before starting another.
Check identity through the whole sequence
A good opening frame can hide problems later in the clip. Check the following moments separately so you can improve the relevant photo without changing both inputs at once.
The close-up looks like a different person
Check firstWatch the approaching performer and the closer facial shots. Compare face shape, hair, collar, and expressions with Photo 2.
NextUse a clearer Photo 2 with an unobstructed face. In a character sheet, make sure the face crop shows the same person as the full-body views.
Outfits change when someone turns
Check firstLook at rear views, sleeves, trousers or skirt, and shoes. A front-only image may leave the back of an outfit unspecified.
NextAdd a consistent back view to that role’s single reference sheet. Avoid mixing different outfits or hairstyles in the panels.
The two roles blend or swap
Check firstPause on shared pier shots and the ending. Confirm Photo 1 still follows the seated source role and Photo 2 still follows the approaching role.
NextRecheck the upload order. Choose distinct, readable character references and keep the prepared mapping if you edit the prompt.
Want to customize more?
The ready-made template comes with the motion reference and prompt prepared. Upload the role photos shown above to make this version with fewer steps. The original reference soundtrack is included.
For a different background, supporting cast, or performance, open the Motion Transfer workspace on the homepage. Upload your own motion video and reference images, choose a compatible model, and adjust the prompt to describe what should change and what should stay. Available inputs depend on the selected model.
What to expect from AI video generation
AI video results can vary, even with the same photos and prompt. Faces and outfits may drift between cuts or turns, especially when the two performers overlap. Consistency remains a limitation of current AI video models, so a good result may take more than one attempt.
Start with clear reference images and review the full video. If something looks wrong, change one image or instruction at a time. Another attempt can produce a different result, but it does not guarantee an improvement.
Raindance photo and video questions
Do I need six photos for two three-panel sheets?
No. Each role uses one uploaded file. A three-panel sheet combines front, back, and close-up views of the same character in that file. Two ordinary full-body photos, one per role, are also accepted.
Can the replacement characters have different genders?
Yes. The dark shirt and mint dress identify the source roles. Your photos provide the replacement appearance. Keep the upload order and use people or characters you have permission to transform.
Can I make this version shorter or vertical?
The edit follows the prepared reference length and framing. This page offers resolution choices, not a new shot sequence or length picker.
Cast your two Raindance roles
Bring one consistent reference for each performer, check the order, and use the prepared seaside performance.
Open the Raindance tool